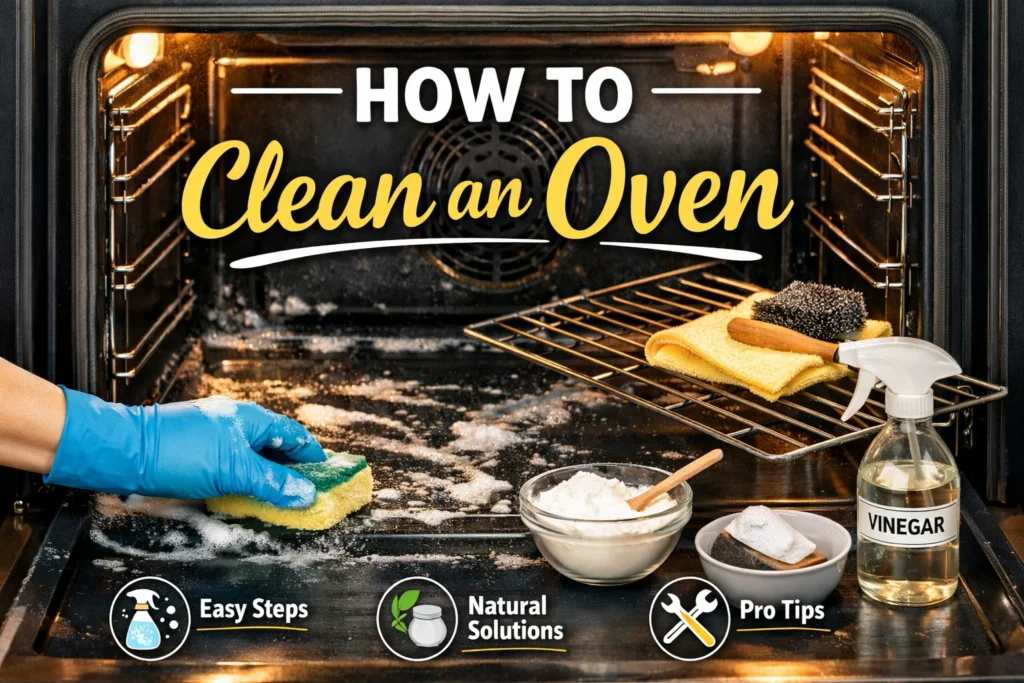
Have you ever opened your oven to preheat it and been hit with a burnt smell? Or worse, noticed smoke filling your kitchen while baking something simple like cookies? Grease splatters, food spills, and baked on residue build up faster than most homeowners realize. Over time, that buildup not only creates unpleasant odors but can also affect how your oven cooks.
If you are wondering how to clean an oven properly without damaging it, this detailed guide will walk you through everything you need to know. From basic weekly maintenance to deep cleaning stubborn grease, you will learn practical, safe, and effective methods that actually work.
Let’s get started.
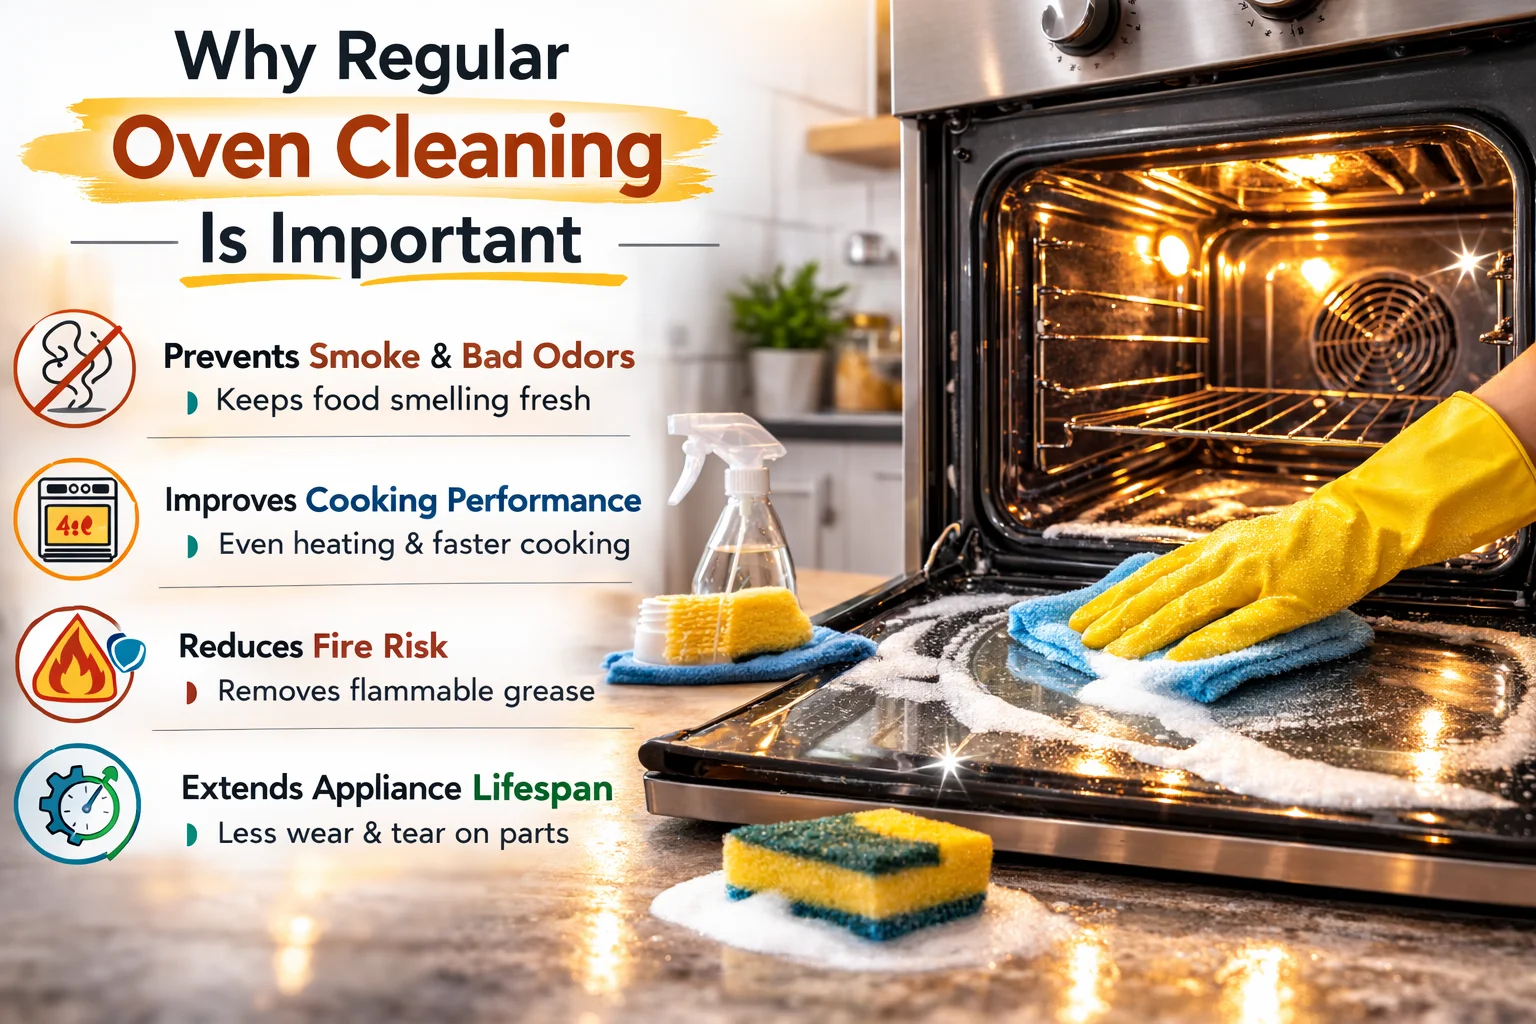
Why Regular Oven Cleaning Is Important
Many homeowners delay oven cleaning until it becomes unbearable. That is a mistake. Regular oven cleaning is not just about appearance.
Here is why it matters:
1. Prevents Smoke and Bad Odors
Burnt food residue and grease produce smoke and strong smells when heated. That odor can transfer directly to your food and affect taste. Regular cleaning removes the source of that smoke before it becomes a recurring issue.
2. Improves Cooking Performance
Heavy grease buildup interferes with proper heat circulation. Your oven may cook unevenly, take longer to preheat, or struggle to maintain consistent temperature. A clean interior allows heat to distribute evenly for better baking and roasting results.
3. Reduces Fire Risk
Grease is highly flammable. Thick buildup inside the oven increases the risk of flare ups, especially during high temperature cooking. Removing grease reduces potential fire hazards and keeps your kitchen safer.
4. Extends Appliance Lifespan
A clean oven works more efficiently and experiences less strain. This reduces wear and tear on heating elements, temperature sensors, and internal components. Proper maintenance can help you avoid unnecessary service calls.
If your oven is not heating properly even after cleaning, the issue may go beyond surface buildup. In that case, you may need a reliable oven repair service to diagnose problems with the heating element or thermostat.
Tools and Supplies You’ll Need
Before you begin cleaning, gather the right tools. This makes the process faster and safer.
Basic supplies:
-
Rubber gloves
-
Microfiber cloths
-
Non-scratch scrub sponge
-
Plastic scraper or spatula
-
Baking soda
-
White vinegar
-
Spray bottle
-
Dish soap
-
Warm water
-
Paper towels
-
Old towel or newspaper to protect the floor
For heavy grease:
-
Commercial oven cleaner
-
Degreasing solution
-
Razor blade scraper (for glass only)
Always unplug the oven or turn off the circuit breaker before deep cleaning. Safety should always come first.
Step by Step Guide: How to Clean an Oven
Follow these steps carefully to clean your oven effectively without causing damage.
Step 1: Remove the Oven Racks
Start by taking out all racks, trays, and thermometers.
Place the racks in your sink or bathtub. Fill with hot water and add dish soap. Let them soak for at least 30 minutes.
For stubborn grime:
-
Sprinkle baking soda on the racks
-
Spray vinegar over it
-
Let it fizz and sit for 20 minutes
-
Scrub with a non-scratch pad
Rinse thoroughly and dry completely before placing them back.
Step 2: Clean Loose Debris Inside the Oven
Use a dry cloth or small brush to remove crumbs and loose burnt pieces from the bottom of the oven. This prevents creating a muddy mess when applying cleaning paste.
Avoid using a vacuum unless it is specifically designed for fine debris and safe for appliance interiors.
Step 3: Use a Baking Soda Paste for Natural Cleaning
If you prefer a natural method, baking soda and vinegar work extremely well.
How to make the paste:
-
Mix half a cup of baking soda with a few tablespoons of water
-
Stir until it forms a thick, spreadable paste
Spread the paste over the interior surfaces of the oven. Avoid heating elements and gas vents.
Focus on:
-
Oven walls
-
Bottom surface
-
Corners
-
Back panel
Let the paste sit for at least 8 to 12 hours, ideally overnight.
Step 4: Wipe and Spray Vinegar
After letting the baking soda paste sit, wipe it away with a damp cloth.
Spray white vinegar over any remaining baking soda residue. The reaction helps lift stubborn grease. Wipe clean until all residue is gone.
This method is effective for moderate buildup and safe for most oven interiors.
Step 5: Deep Cleaning for Heavy Grease
If your oven has thick black grease buildup, you may need a stronger approach.
Use a commercial oven cleaner according to manufacturer instructions. Most products require:
Always wear gloves and ensure good ventilation. Keep children and pets away during the process.
Do not spray directly onto heating elements or sensitive components.
Step 6: Cleaning the Oven Door Glass
The oven door glass often collects grease splatter that blocks visibility.
To clean it:
-
Apply baking soda paste directly to the glass
-
Let it sit for 20 to 30 minutes
-
Gently scrub with a sponge
-
Wipe clean with a damp cloth
For stubborn stains, use a razor blade scraper carefully at a low angle. Never use excessive force. Avoid scratching the glass.
If moisture appears between glass panels, this may indicate a seal issue. That requires professional repair, not just cleaning.
Step 7: Cleaning Heating Elements Safely
Heating elements are delicate. Handle them carefully.
For electric ovens:
-
Make sure the oven is fully disconnected
-
Gently wipe the element with a damp cloth
-
Do not use abrasive cleaners
For gas ovens:
-
Avoid spraying directly into gas ports
-
Clean around burners carefully
If heating elements look damaged, blistered, or unevenly colored, cleaning will not solve the problem. In such cases, you may need professional repair.
How Often Should You Clean Your Oven?
Cleaning frequency depends on usage.
-
Light use, once or twice per week cooking: Clean every 3 to 4 months
-
Moderate use: Clean every 2 to 3 months
-
Heavy use or frequent roasting: Clean monthly
Wipe spills immediately after cooking once the oven cools down. Quick action prevents hard baked stains.
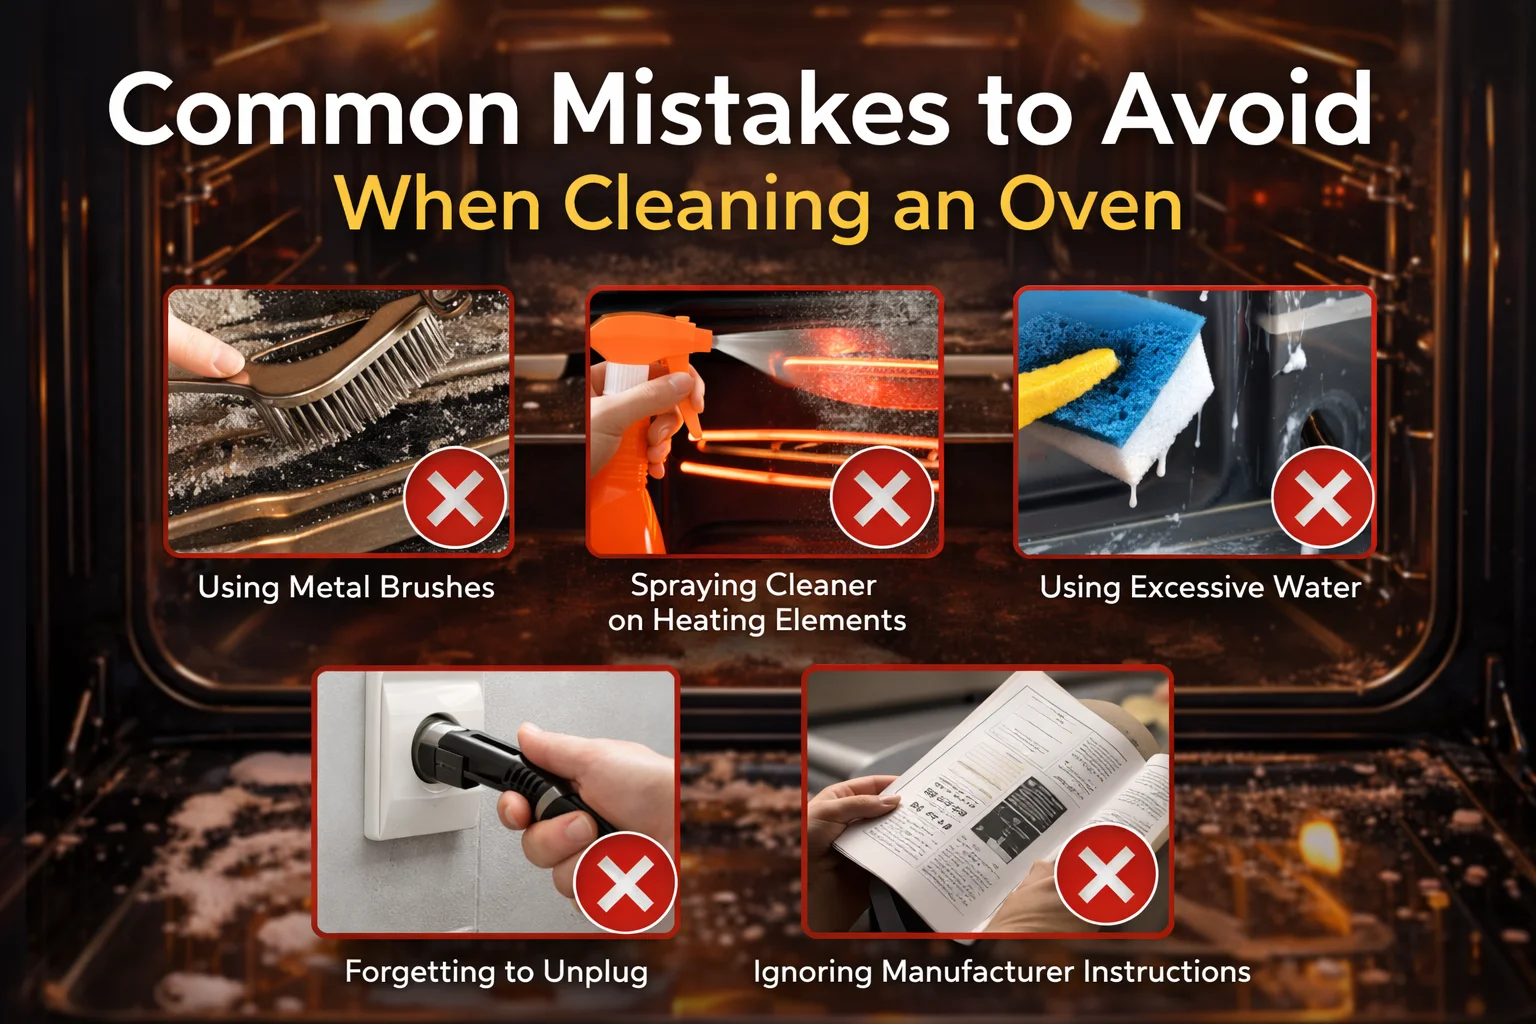
Common Mistakes to Avoid When Cleaning an Oven
Even with the best intentions, many homeowners accidentally damage their oven while trying to clean it. Avoid these common mistakes to protect your appliance and prevent costly repairs.
1. Using Metal Brushes or Steel Wool Inside the Oven
It may seem logical to use a tough metal brush for stubborn grease, but this can permanently damage your oven.
Most modern ovens have a protective porcelain or enamel coating on the interior. Metal brushes, steel wool, and harsh scouring pads scratch that surface. Once scratched:
-
Grease sticks more easily
-
Rust may develop
-
The interior becomes harder to clean over time
-
Heat distribution may be affected
Instead, use a non scratch sponge, plastic scraper, or microfiber cloth. Let cleaning solutions sit longer rather than scrubbing harder.
2. Spraying Cleaner Directly on Heating Elements
Heating elements are sensitive components. Spraying oven cleaner directly onto them can cause several problems:
-
Chemical residue burns when heated
-
Strong toxic fumes may develop
-
The element coating can deteriorate
-
Electrical connections may corrode
If residue burns onto the element, you may notice smoke or a strong chemical smell during the next use.
Always apply cleaning products to surfaces around the element, not directly on it. For light cleaning, gently wipe the element with a damp cloth once it is completely cool and the power is disconnected.
If your oven stops heating properly after a cleaning attempt, you may need professional help from an oven repair service to inspect the element safely.
3. Forgetting to Unplug the Oven or Turn Off Power
This is one of the most dangerous mistakes.
Electric ovens carry high voltage. Cleaning with moisture while the appliance is still connected increases the risk of:
-
Electric shock
-
Short circuits
-
Damage to control boards
-
Tripping the breaker
Before deep cleaning, unplug the oven if possible or switch off the circuit breaker.
Gas ovens should also be turned off completely before cleaning. Safety should always come first.
4. Using Excessive Water Inside the Oven
Water may seem harmless, but too much moisture can cause serious issues.
Excess water can:
-
Seep into wiring and insulation
-
Damage electronic controls
-
Cause rust on internal metal parts
-
Lead to corrosion over time
Avoid soaking the interior. Instead, use a damp cloth and controlled application of cleaning paste or spray.
If you notice flickering displays or malfunctioning buttons after cleaning, moisture may have reached internal components. That situation requires professional diagnosis.
5. Ignoring Manufacturer Instructions
Not all ovens are designed the same way.
Some have:
-
Self-cleaning coatings
-
Steam cleaning functions
-
Hidden heating elements
-
Specialized enamel interiors
Using the wrong cleaning method can damage special coatings or void your warranty.
Always check your owner’s manual before deep cleaning. If you no longer have it, search for your model online using the manufacturer’s website.
Ignoring instructions can turn a simple cleaning job into a repair situation. For example, some homeowners mistakenly use strong chemicals inside self cleaning ovens, which can damage internal sensors. In such cases, companies like Caspi Home Service often see preventable damage that could have been avoided by following manufacturer guidelines.
6. Running the Self Cleaning Cycle Too Frequently
Many people rely heavily on the self cleaning feature without understanding how it works.
Self cleaning cycles heat the oven to extremely high temperatures to burn off residue. While effective, excessive use can:
If your oven struggles after a self cleaning cycle, it may need inspection. This is similar to situations where homeowners search for how to repair microwave oven not heating after misuse. High heat and electrical stress can damage internal systems in many appliances.
Use self cleaning only when necessary and ensure proper ventilation during the cycle.
7. Mixing Cleaning Chemicals
Some homeowners mix products thinking it will increase cleaning power. This can be extremely dangerous.
For example:
-
Mixing vinegar and commercial oven cleaner can create harmful fumes
-
Combining different chemical cleaners may release toxic gases
Always use one cleaning method at a time. Rinse thoroughly before switching to another product.
Signs Your Oven Needs Professional Repair Instead of Cleaning
Sometimes cleaning is not enough.
Look for these warning signs:
If your oven still does not heat after cleaning, the issue may involve the heating element, temperature sensor, or control board.
Just like when homeowners search for how to repair microwave oven not heating, many appliance issues require technical diagnosis beyond basic maintenance.
When to Call an Oven Repair Service
You should call a professional if:
-
The oven trips the breaker
-
Gas smell is present
-
Heating element is cracked
-
The oven does not turn on
-
Self-cleaning cycle causes malfunction
An experienced oven repair service can safely inspect wiring, thermostats, control boards, and internal components.
For homeowners looking for trusted appliance expertise, Caspi Home Service provides professional oven diagnostics and repairs backed by experienced technicians. If cleaning does not solve the issue, professional support ensures your appliance works safely and efficiently.
Preventive Maintenance Tips
Prevent buildup and extend your oven’s lifespan with these habits:
1. Use oven liners
Place a heat safe liner on the bottom rack, not directly on the oven floor unless manufacturer approved.
2. Cover dishes when roasting
This reduces grease splatter.
3. Wipe spills immediately
Clean minor spills after each use once the oven cools.
4. Avoid overfilling baking trays
Spills cause stubborn burnt residue.
5. Run light cleaning cycles regularly
Do not wait for severe buildup.
Preventive care reduces the need for aggressive chemicals and costly repairs.
Conclusion
A clean oven is not just about appearance. It improves cooking performance, prevents smoke, reduces fire risk, and extends the life of your appliance. By following these step by step cleaning methods, you can safely remove grease, baked on residue, and food spills without damaging internal components.
However, if your oven continues to malfunction after cleaning, the issue may go beyond surface grime. Professional support ensures safe and reliable performance.
For expert inspection and dependable appliance solutions, Caspi Home Service offers trusted repair services that keep your kitchen running smoothly.
Take action today. Start with a thorough cleaning, maintain it regularly, and call a professional when needed. Your oven and your meals will thank you.
Frequently Asked Questions
What is the best way to clean an oven naturally?
Baking soda paste combined with vinegar is one of the safest and most effective natural methods. Let the paste sit overnight for best results.
Can I use the self cleaning feature?
Yes, but use it carefully. Self cleaning cycles reach extremely high temperatures. Remove racks beforehand and ensure proper ventilation. If your oven has a history of electrical issues, consult a technician first.
How do I clean burnt grease from an oven?
For heavy grease, use a commercial oven cleaner or a baking soda paste left overnight. Scrub gently with a non scratch sponge.
Why does my oven still smell after cleaning?
Persistent odor may indicate grease trapped in hidden areas, faulty wiring, or heating element issues. In that case, professional inspection is recommended.
How do I know if my oven heating element is bad?
Signs include uneven cooking, no heat, visible cracks in the element, or glowing only partially. Cleaning will not fix a damaged heating element.